> ## Documentation Index
> Fetch the complete documentation index at: https://dripart-chore-sync-comfy-api-v2-spec-b886298.mintlify.site/llms.txt
> Use this file to discover all available pages before exploring further.
# ComfyUI MoGe 예제
> 이 가이드에서는 ComfyUI에서 MoGe를 사용해 단안 기하학 추정, 즉 계량 점 지도, 깊이 지도, 법선 지도 및 메시 생성 방법을 보여줍니다.
# ComfyUI MoGe 소개
[MoGe](https://github.com/microsoft/MoGe) (CVPR 2025, 마이크로소프트 리서치 출처)는 단안 오픈 도메인 이미지로부터 3D 기하학을 복원하는 강력한 모델입니다. 이 모델은 한 번의 순방향 전파만으로 계량 점 지도, 계량 깊이 지도, 법선 지도 및 카메라 FOV를 추정합니다.
주요 기능:
* **정확한 3D 기하 추정**: 단일 이미지에서 점 지도, 깊이 지도 및 법선 지도를 하나의 모델, 한 번의 순방향 전파로 추정
* **계량 스케일**(MoGe-2): 실세계 스케일의 점 지도와 깊이 지도
* **유연한 해상도 지원**: 다양한 해상도와 종횡비(2:1부터 1:2까지)와 호환
* **빠른 추론**: A100 / RTX 3090에서 이미지당 약 60ms (FP16, ViT-L)
* **원근법 및 파노라마 이미지로부터 메시 생성**
MoGe는 두 가지 버전으로 제공됩니다:
| 파일 | 버전 | 계량 스케일 | 법선 지도 | 매개변수 |
| ------------------------- | ---------- | :----: | :---: | :--: |
| `moge_1_vitl_fp16` | **MoGe-1** | - | - | 314M |
| `moge_2_vitl_normal_fp16` | **MoGe-2** | ✅ | ✅ | 331M |
> MoGe-2는 계량 스케일과 고화질 법선 지도 추정을 추가하여 더 선명한 시각적 디테일과 낮은 추론 레이턴시를 제공합니다. **법선 포함된 MoGe-2(`moge_2_vitl_normal_fp16`)가 권장 체크포인트입니다.**
ComfyUI가 최신 버전으로 업데이트되었는지 확인하세요.
* [ComfyUI 다운로드](https://www.comfy.org/download)
* [업데이트 가이드](/ko/installation/update_comfyui)
이 가이드의 워크플로는 [워크플로 템플릿](/ko/interface/features/template)에서 확인할 수 있습니다.
템플릿에서 찾을 수 없다면, 귀하의 ComfyUI가 오래된 버전일 수 있습니다.
워크플로를 로드할 때 노드가 누락되는 경우, 가능한 원인:
1. 최신 ComfyUI 버전(최신 테스트 버전(nightly))을 사용하고 있지 않음
2. 일부 노드가 시작 시 가져오기에 실패함
* [클라우드](https://cloud.comfy.org)는 ComfyUI 안정판 출시 후 업데이트됩니다.
따라서 이 문서에서 핵심 노드가 누락된 것을 발견했다면, 그 이유는 새로운 핵심 노드가 아직 최신 안정판에 공개되지 않았기 때문일 수 있습니다. 다음 안정판 출시를 기다려 주세요.
ComfyUI는 이제 MoGe 노드를 기본적으로 지원합니다. 시작하기 전에 [ComfyUI](https://github.com/Comfy-Org/ComfyUI)의 최신 버전으로 업데이트했는지 확인하세요.
생성된 `.glb` 형식의 모델은 `ComfyUI/output/mesh` 폴더에 출력됩니다.
## 모델 설치
MoGe 체크포인트를 다운로드하고 해당 ComfyUI 폴더에 저장하세요:
* **MoGe-2 (권장)**: [moge\_2\_vitl\_normal\_fp16.safetensors](https://huggingface.co/Comfy-Org/MoGe/blob/main/moge_2_vitl_normal_fp16.safetensors)
* **MoGe-1 (기준)**: [moge\_1\_vitl\_fp16.safetensors](https://huggingface.co/Comfy-Org/MoGe/blob/main/moge_1_vitl_fp16.safetensors)
```
ComfyUI/
├── models/
│ ├── geometry_estimation/
│ │ ├── moge_2_vitl_normal_fp16.safetensors
│ │ └── moge_1_vitl_fp16.safetensors
```
## 예제 워크플로우
MoGe: 깊이 추정
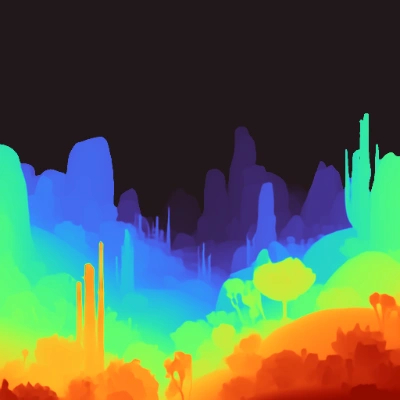
단일 RGB 이미지를 업로드하여 컬러 깊이 미리보기와 원시 깊이 맵을 생성합니다.
 Comfy Cloud에서 열기
JSON 다운로드 또는 템플릿 라이브러리에서 "MoGe: 깊이 추정" 검색
**입력 자료**
다음 파일을 일치하는 `LoadImage` 노드에 업로드하세요:
`LoadImage` 노드 9 · `alien_world.png`
### 1.1 실행 단계
1. `LoadMoGeModel` 노드가 MoGe 체크포인트를 로드했는지 확인합니다.
2. `Load Image` 노드에 이미지를 불러옵니다.
3. `Queue`를 클릭하거나 `Ctrl(cmd) + Enter`를 눌러 실행합니다.
4. 워크플로는 컬러 깊이 미리보기, 원시 깊이 미리보기, 그리고 마스크를 출력합니다.
Comfy Cloud에서 열기
JSON 다운로드 또는 템플릿 라이브러리에서 "MoGe: 깊이 추정" 검색
**입력 자료**
다음 파일을 일치하는 `LoadImage` 노드에 업로드하세요:
`LoadImage` 노드 9 · `alien_world.png`
### 1.1 실행 단계
1. `LoadMoGeModel` 노드가 MoGe 체크포인트를 로드했는지 확인합니다.
2. `Load Image` 노드에 이미지를 불러옵니다.
3. `Queue`를 클릭하거나 `Ctrl(cmd) + Enter`를 눌러 실행합니다.
4. 워크플로는 컬러 깊이 미리보기, 원시 깊이 미리보기, 그리고 마스크를 출력합니다.
MoGe: 원근 기하 추정

이미지를 업로드하여 원근 기하를 추정합니다. 입력에서 3D 깊이 맵과 표면 노멀을 생성한 다음, 텍스처가 적용된 GLB 메시로 변환합니다.
 Comfy Cloud에서 열기
JSON 다운로드 또는 템플릿 라이브러리에서 "MoGe: 원근 기하 추정" 검색
**입력 자료**
다음 파일을 일치하는 `LoadImage` 노드에 업로드하세요:
`LoadImage` 노드 9 · `modern_living_room.png`
이는 **단안 기하 추정**입니다: 가려진 영역과 물체 뒷면은 누락되거나 조각조각 날 수 있습니다. 빠른 장면 프로토타이핑, 참조 기하, 또는 깊이와 노멀을 메시로 시각화하는 데 유용하지만, 다중 뷰 3D 재구성을 대체하지는 않습니다.
### 2.1 실행 단계
1. `LoadMoGeModel` 노드가 MoGe 체크포인트를 로드했는지 확인합니다.
2. `Load Image` 노드에 원근 사진을 불러옵니다.
3. (선택 사항) OpenGL 및 DirectX 노멀 미리보기를 확인합니다.
4. `Queue`를 클릭하거나 `Ctrl(cmd) + Enter`를 눌러 실행합니다.
Comfy Cloud에서 열기
JSON 다운로드 또는 템플릿 라이브러리에서 "MoGe: 원근 기하 추정" 검색
**입력 자료**
다음 파일을 일치하는 `LoadImage` 노드에 업로드하세요:
`LoadImage` 노드 9 · `modern_living_room.png`
이는 **단안 기하 추정**입니다: 가려진 영역과 물체 뒷면은 누락되거나 조각조각 날 수 있습니다. 빠른 장면 프로토타이핑, 참조 기하, 또는 깊이와 노멀을 메시로 시각화하는 데 유용하지만, 다중 뷰 3D 재구성을 대체하지는 않습니다.
### 2.1 실행 단계
1. `LoadMoGeModel` 노드가 MoGe 체크포인트를 로드했는지 확인합니다.
2. `Load Image` 노드에 원근 사진을 불러옵니다.
3. (선택 사항) OpenGL 및 DirectX 노멀 미리보기를 확인합니다.
4. `Queue`를 클릭하거나 `Ctrl(cmd) + Enter`를 눌러 실행합니다.
Moge: 파노라마를 메시로
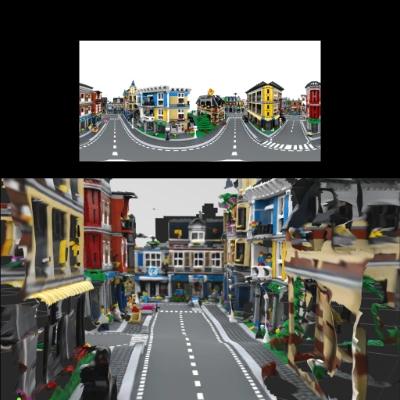
등장방형 360° 파노라마 이미지를 업로드하고 정점 색상이 포함된 텍스처 GLB 메시를 생성합니다.
 Comfy Cloud에서 열기
JSON 다운로드 또는 템플릿 라이브러리에서 "Moge: 파노라마를 메시로" 검색
**입력 자료**
다음 파일을 일치하는 `LoadImage` 노드에 업로드하세요:
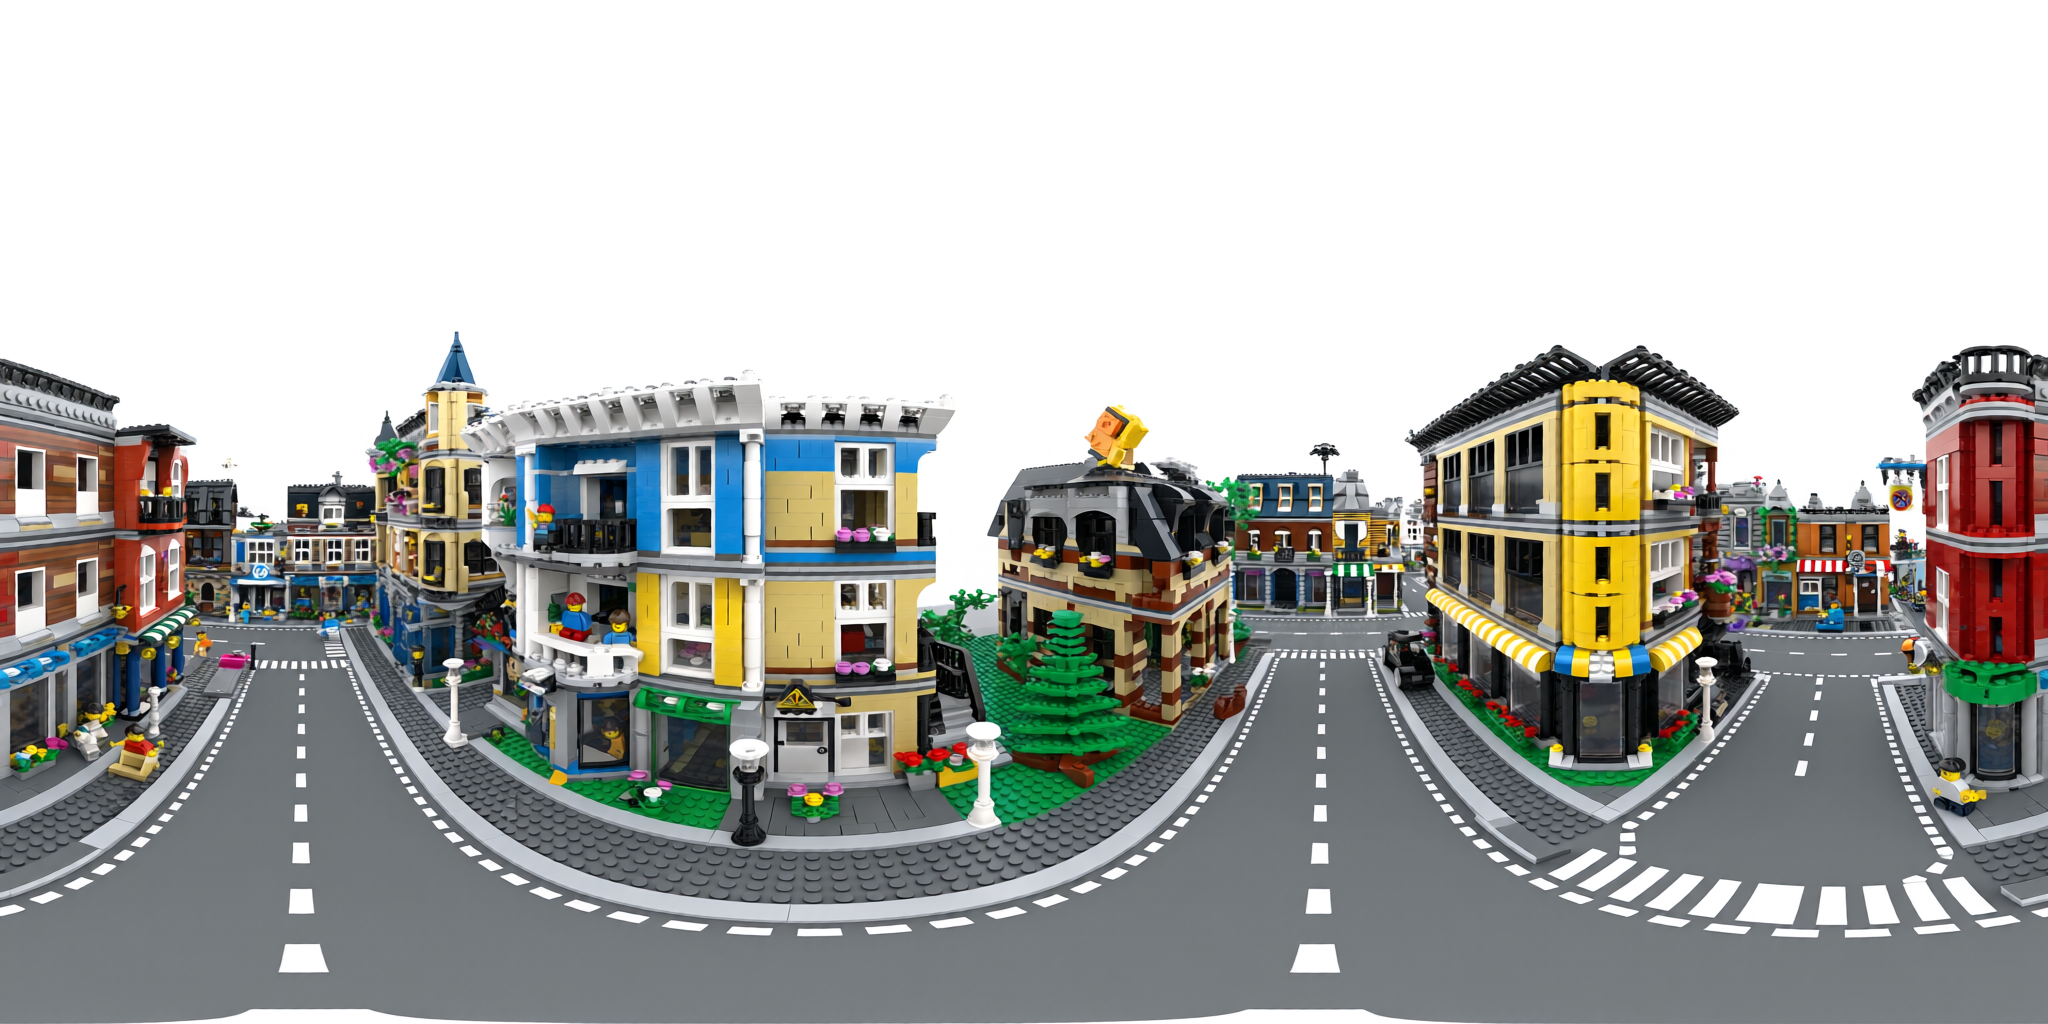
`LoadImage` 노드 28 · `lego_street_panorama.png`
워크플로는 `MoGePanoramaInference`를 사용하여 파노라마를 12개의 원근 뷰로 분할하고, 각 뷰에 대해 독립적으로 단안 기하 추정을 실행한 다음 단일 메시로 병합합니다.
### 3.1 실행 단계
1. `LoadMoGeModel` 노드가 MoGe 체크포인트 중 하나를 로드했는지 확인합니다.
2. `Load Image` 노드에 등장방형 파노라마 이미지를 불러옵니다.
3. `Queue`를 클릭하거나 `Ctrl(cmd) + Enter`를 눌러 실행합니다.
***
## 커뮤니티 자료
* [MoGe GitHub (microsoft/MoGe)](https://github.com/microsoft/MoGe): 연구 논문 및 코드
* [Comfy-Org/MoGe](https://huggingface.co/Comfy-Org/MoGe): 공식 ComfyUI 모델 가중치
Comfy Cloud에서 열기
JSON 다운로드 또는 템플릿 라이브러리에서 "Moge: 파노라마를 메시로" 검색
**입력 자료**
다음 파일을 일치하는 `LoadImage` 노드에 업로드하세요:
`LoadImage` 노드 28 · `lego_street_panorama.png`
워크플로는 `MoGePanoramaInference`를 사용하여 파노라마를 12개의 원근 뷰로 분할하고, 각 뷰에 대해 독립적으로 단안 기하 추정을 실행한 다음 단일 메시로 병합합니다.
### 3.1 실행 단계
1. `LoadMoGeModel` 노드가 MoGe 체크포인트 중 하나를 로드했는지 확인합니다.
2. `Load Image` 노드에 등장방형 파노라마 이미지를 불러옵니다.
3. `Queue`를 클릭하거나 `Ctrl(cmd) + Enter`를 눌러 실행합니다.
***
## 커뮤니티 자료
* [MoGe GitHub (microsoft/MoGe)](https://github.com/microsoft/MoGe): 연구 논문 및 코드
* [Comfy-Org/MoGe](https://huggingface.co/Comfy-Org/MoGe): 공식 ComfyUI 모델 가중치